
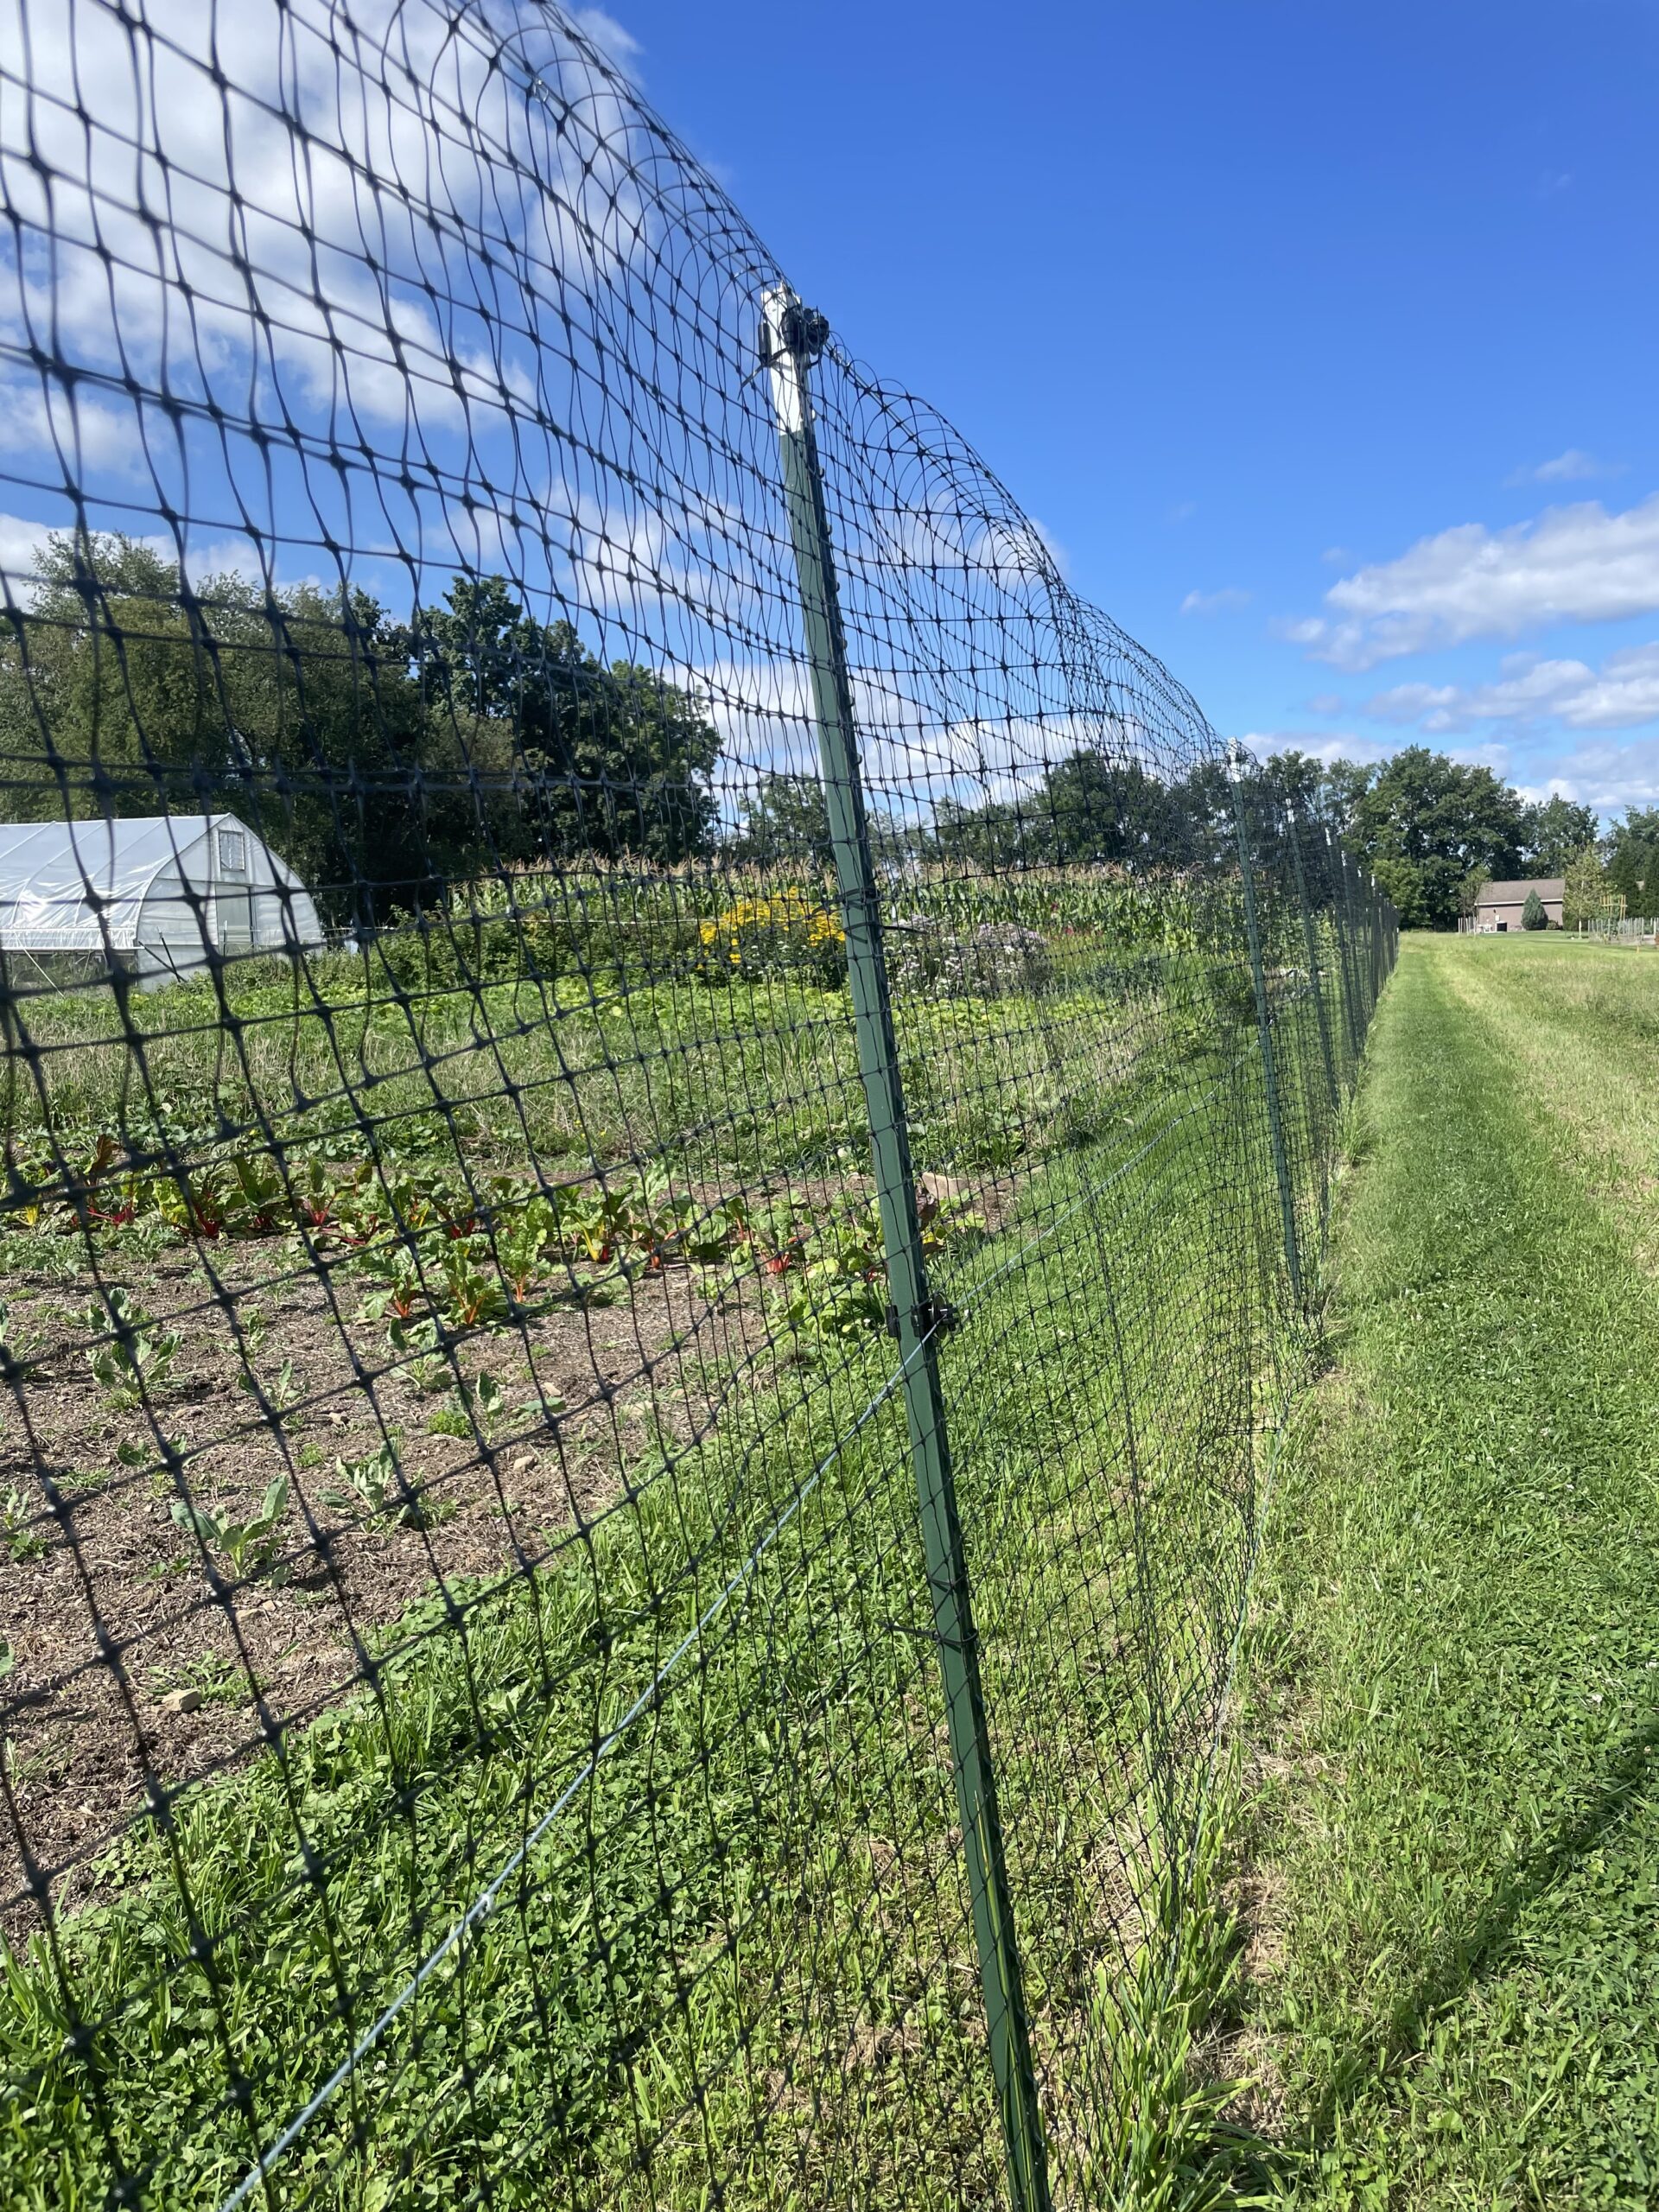
As I developed my plan to start a small-scale market garden, one thing was very clear: protection from deer is a must. Here in Western PA, deer are incredibly abundant. Their penchant for plant destruction also pales in comparison to other mammalian pests. A single deer in a single night can do hundreds or even thousands of dollars in damage. So, farming vegetables may as well be impossible without a strategy to keep deer out.
There are quite a few options for farmers to protect from deer, but after much research, I decided on a tall deer fence as the simplest, most practical, and foolproof option. Foolproof, it turns out, is not the way to describe my experience designing, building, and maintaining a deer fence. More than maybe any other aspect of my farming journey, the deer fence has featured learning, failure, catastrophe, and lots of hard work. Here’s a brief history of how our deer fence has grown in nearly 4 years of farming!
The Early, Naive Days
The type of deer fence I settled on as appropriate for the farm is sometimes called an “invisible” fence. Rather than electric fences or “3D” fences, this type of fence is tall and simple. The fence material is a lightweight plastic mesh that is 7 or 8 feet tall. The mesh is usually black, which blends into the background and becomes somewhat invisible. Deer, having notoriously poor depth perception, have trouble seeing the fence, especially the top of it. This makes them uninclined to try and jump the fence, thus keeping them out of your garden.
I chose this style of fence for how compact and simple it seemed. 3D fences take up space, which I don’t have much of at my scale. Meanwhile, I had 0 experience with electric fences when we first started the farm, and didn’t feel comfortable learning at the time.
My first iteration of the fence was just about as simple as it gets. I took some 8′ T-posts spaced out about 15′, and attached a 7′ mesh deer fence to them using zip ties. This initial fence was relatively temporary, going only around my initial “test garden” plots the year before we launched the farm. The idea was to see how that design worked before expanding to the larger area of the production garden.
Well, let’s just say we saw how the design worked, and it was bad. The wind had no problem ripping the fence off the T-posts, ripping the T-posts out of the ground, etc. We added ground stakes on the fence between posts for more support, more zip ties, and a top wire so the fence didn’t sag, but even then, the fence would be ripped off in large sections several times over the winter.
Several mornings spent re-setting the fence, and hundreds of zip ties later, I knew that we needed something more resilient in our windy area.
Improvements and Learning
Over the course of the next year or two, I learned many things that are probably obvious to anyone who knows anything about fences. These improvements led to a fence that was able to hold up to wind events with only occasional maintenance on my part.
Firstly, we realized that our T-posts worked better as a team than as individuals. One T-post getting tugged at by a wind-blown fence quickly leans over, causing the fence to sag. The problem only gets worse over time. If, however, the posts are connected to each other with tensioned wires, they can collectively withstand the wind without bending out of the soil.
We added 3 wires (top, middle, bottom) and attached them first and foremost to the T-posts using insulators made for electric fences. Then, we added little round tensioners that allowed us to get those wires really tight using a tensioning tool.

We then quickly realized that the tension on the wires was great for the middle sections of the fence, but the corners were quickly sagging due to the force from the tensioned wires. We added corner bracing (again, something that seems very obvious in retrospect). Our T-posts were now solid and stable!
The other main change we made was to attach the fence itself to the wires rather than to the posts. Doing this kept the fence attached to the structure continuously, rather than every 15′ to each post. We learned about hog rings, making it relatively fast to hook the fence to the wires at roughly 1′ intervals.
We now had a fence that blew around less in the wind, and T-posts that weren’t loosening and leaning! The fence was starting to get through most of our wind events with little or no damage. We had created a sustainable design at last! But the old fence that spent 3 years getting battered and torn was wearing down, and our farm had filled the space we created for it. It was time to make another change!
Forcing Our Hand To Upgrade
As I write this, in the summer of 2026, I have just completed a major upgrade to the fence. You may be thinking “summer isn’t the best time for a farmer to be doing such a project,” and you’d be right!
We began seeing signs of deer damage in late June/early July. Our sweet potatoes, green beans, corn, carrots, and lettuce were being slowly shredded to bits, and the signs of deer were everywhere. Even though I was walking the fence and making repairs nightly, it did not seem to be stopping deer from getting in and causing major damage. Clearly, we needed to do more, and quickly, if we wanted to avoid major calamity.
We had planned to expand the fence over the winter, but we moved the plan forward to, well, immediately. The plan was to completely replace the plastic mesh fence and tension wires, expand the fenced-in area to accommodate 9 more plots, and add gates so that we could get in and out of the fenced area more easily. We also planned to improve the way we attached the fence to make mowing and weed whacking around it easier.
After herculean efforts and some help from a few friends, the new fence is up. We’re about a week strong without deer presence after nightly attacks before replacing the fence. We don’t know if we’ve fully solved the problem, but regardless, this new fence has many improvements. The gates will save us lots of time we previously spent having to walk all the way around to the front to get from one side to another. Plus, we now have a big space to expand into without worrying about feeding the deer!

After completing this upgrade, I’ve been thinking back to that first design, realizing how far I’ve come and how much I’ve learned along the way. It may have been a ton of time, effort, sweat, and tears, but I think I am a better farmer and homesteader for that effort. Sometimes you learn by making lots of mistakes, and that is ok!
Meanwhile, we’ll be crossing our fingers that this fence does its job. Otherwise, there will be more to learn!