
One of our big off-season projects has been preparing the farm to raise chickens to produce eggs for us and our customers. We’ll be doing much more blogging on that endeavor once the chicks arrive. But before that, a major step is designing and building a home for those chickens. And that’s a perfect task for a relatively warm stretch of weather in January.
For this post, it’s all a bout the chicken house. We’ll lay out the design, why we chose the structure we chose, plus the materials and build. We’re excited about this next step in our growing journey!
A Mobile Design For Pastured Poultry
Step one in determining how we would house our chickens begins with how we want to raise and care for them. Being a highly ecological and environmentally conscious farm, we knew that the ideal system is one where our chickens have lots of sun and space to live happy lives and produce excellent eggs.
Chickens are naturally inclined to spend their days foraging the ground for bugs, plants, and basically anything they can get their beaks on. At night, they like to “roost” off the ground. They also need protection from hot sun, cold wind, rain, and snow.
Additionally, chickens disturb the ground quite a bit as they forage. To prevent bare soil and its negative effects, chickens must either be moved frequently to a new space or have deep mulch.
Since we have plenty of “pasture”, or areas on the farm that are basically just grass fields that we mow a few times a year, we knew that we wanted to use that area for our chickens. We also want to give them lots of space during the day to forage and allow them shelter at night or during bad weather.
This led us to a fairly well-used system for raising chickens at our scale: electric net fencing surrounding a mobile shelter. Basically, you surround your chickens with an electric net fence that can be moved easily, keeping the chickens in and protecting them from predators. Then, all you need is a simple shelter for them at night, one that you can move. This way, you can rotate the chickens across the pasture, maintaining pasture health and chicken health.
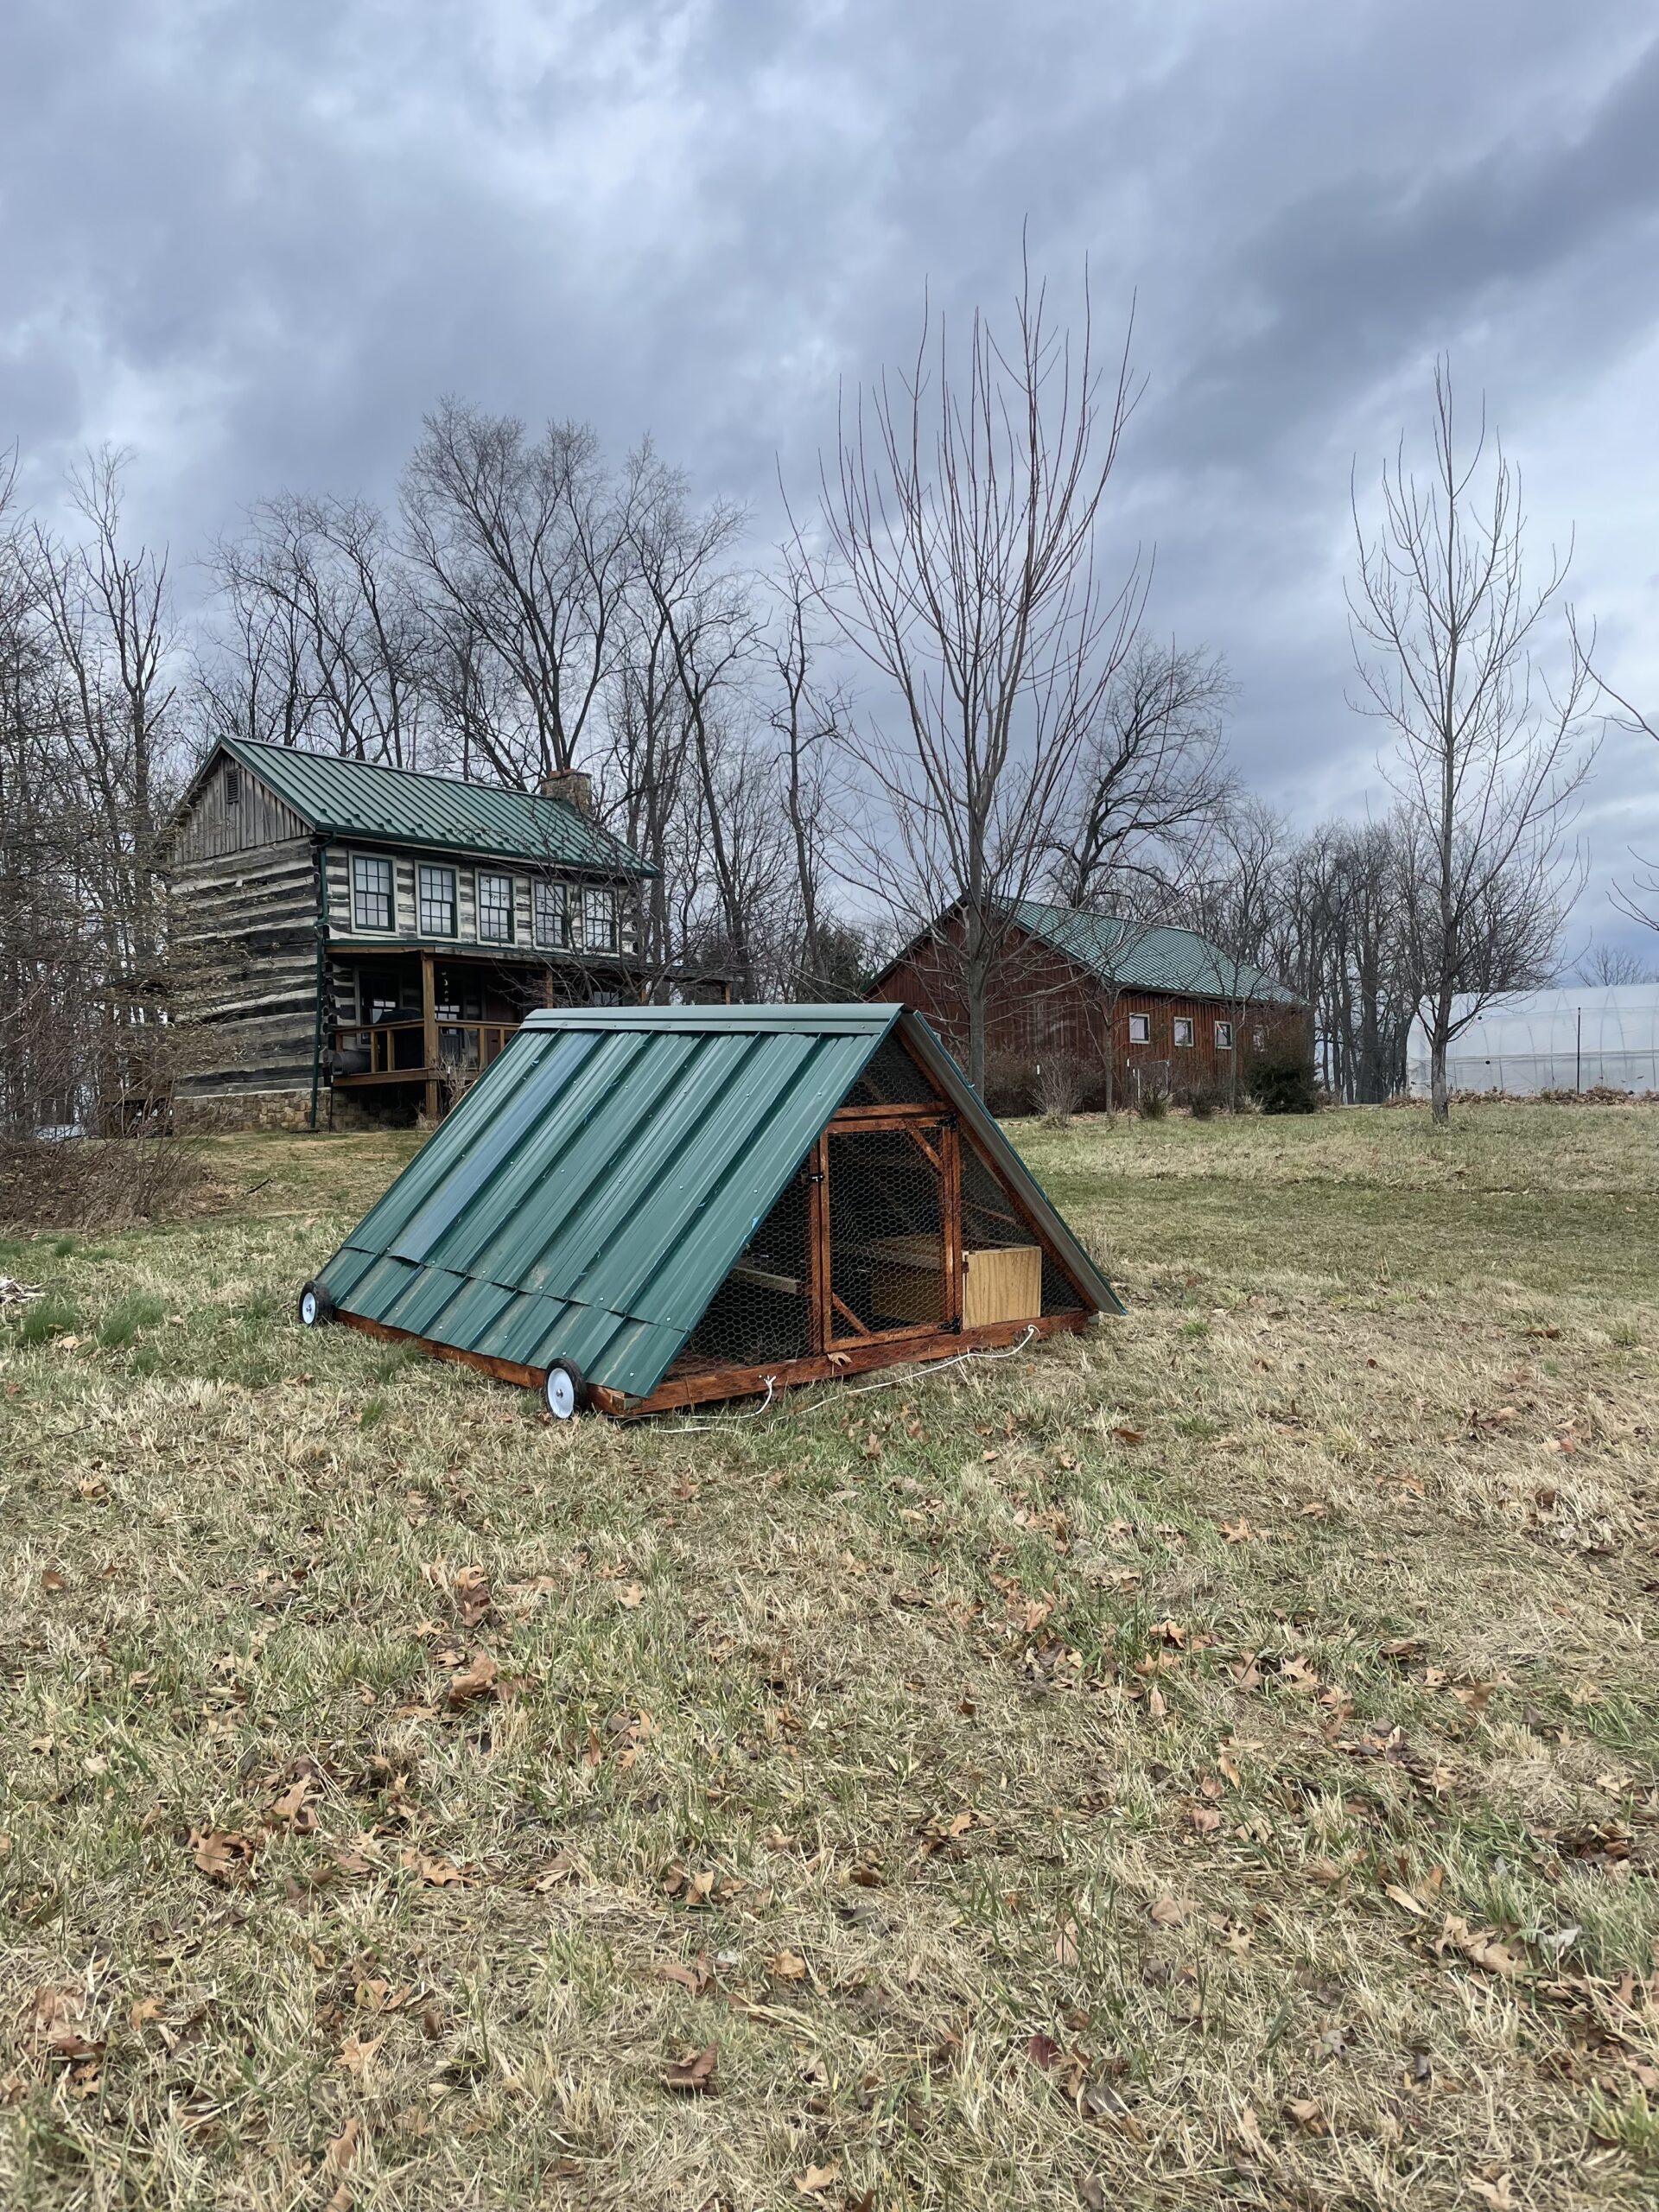
We chose to build an A-frame type shelter, which we think gives us many advantages over other designs.

An All-In-One Shelter
We love to create systems that minimize our labor and simplify our systems. As such, we wanted a shelter that had everything our chickens would need right there, contained within the shelter. This includes spaces for their food bin, dust bathing bin, and waterer. This minimizes the number of times we have to haul food or water out to the chickens. It also allows us to only move the one shelter when we rotate them, rather than the shelter and other objects.
The shelter also has nest boxes that are built in and accessible from the outside. This makes it incredibly easy to collect eggs without crawling into the shelter or disturbing the chickens. Since we’ll eventually be collecting eggs daily once the chicks are moved in and mature, that was an important factor.

The shelter also has rails that serve both as structural components and also roosts for the chickens to be off the ground at night. Its large front door is big enough that we can easily come inside, if needed. That being said, we don’t anticipate having to go inside often, since the food bin and waterer can be accessed from outside, too.
One final but supremely important reason for choosing an A-frame design is wind. We’ve talked before about how windy it can get on the farm, and some chicken shelter designs are either too light or can catch the wind and flip over. Our A-frame is short and stout, and the roof panels go almost to the ground, making it very unlikely that the wind will flip or damage it.
The Build And Materials
While we wouldn’t call the structure “light” exactly, we did intentionally build it to be as light as possible without compromising structure. The framing is almost all 2 by 4s, and everything besides the base frame has been ripped down using a circular saw into thinner strips. There is also lots of cross-bracing that adds rigidity without too much weight.
We saved some money by roofing with metal roof panels left over from the build of our home. This metal roofing is top-tier, and we think it is unlikely that we will ever have to replace it. There is a bit of plywood on the outside to protect nest boxes. Otherwise, the end walls are covered with chicken wire to ensure plenty of airflow, which is critical for shelters. We also painted any outside-facing wood with wood stain to protect against the elements.

Finally, we used four 10-inch wheels bolted to the bottom frame to move the shelter using a rope on the front to make it easy to pull or push. It is surprisingly easy to move forward and backward, though admittedly challenging to turn. This shouldn’t be too much of a problem, since we will mostly move the shelter in a straight line along our pasture.
Overall, building this took one person around 3 full days, and was definitely a fun off-season project! For now, the shelter is hanging out in the field so we can see how it holds up through spring weather.
As we get our chickens set up in the coop, you can expect more updates about our progress. We’re excited to go out each morning, let the chickens out, and collect some of the best eggs in existence this summer!